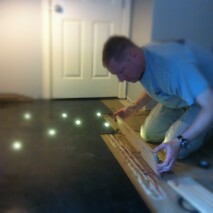
I am fortunate to work with customer’s dreams. This project entailed adding lights to the floor to replicate his memory of landing on aircraft carriers. A true “Man Cave!”
Some work had to be performed prior to wood floor installation………
Prior to wood floor installations, the substrate must be sound and level.
In this bonus room, a section of sub-floor framing was lower by 1/4.”
Solution: Raise the low spot with 1/4″ plywood. This will get the sub-floor on one plane.
After 1/4″ plywood is installed, mix a leveling compound to flush out to adjoining “OK” sections of the sub-floor.
3 applications of mud will be applied with each coat progressively thinner in viscosity for a smooth finish.
Use a straight edge and upside down spray can to mark the area for fill.
Once all leveling compound has been applied, use a rotary sander to remove the high spots.
This is a great sanding material, not concrete, and nails will penetrate without cracking or fracturing.
Prepped substrate, now ready for proper wood floor installation.
Homeowner executing his vision of “Tarmac” lighting theme. Vision, plan, ingenuity, templates, patience!
Careful installation of wood flooring and nailing is important over this low voltage lighting.
Finished lighting installation. Stripes, huge military numeral fonts placed here and there, rivets and water proof naval boat doors will finish theme!
A little messy, but the homeowner was assuring that a mess already existed. Normally, we would do our cuts outside in a “lived in” environment.
You can see the sub-floor has been leveled, floor is installed and the customer has added to the scope, installation of new baseboards.
Completed install with “landing lights” installed.
This white oak plank is so dark its like black paint over the wood!


